How to How to dynamically update the self-host’s IP on namecheap domain ?
If you run a home self-hosted linux server and your internet provider don’t give you a satic IP and you have your own domain name (e.g. purchased from namecheap.com), you can use a simple script to dynamically bind your home internet IP address to your domain name entry on namecheap.
Why just using a free DDNS service ? While, first of all, not all router supports DDNS. Second, free DDNS service often comes with limitations: e.g. in order to keep using the service, you will need to verify monthly. Also, with the free DDNS service, you will only get a sub domain and not a true domain which you owns. So if you own you domain and have a 24/7 linux home server, why not set a DDNS service for you own ?
In this blog, I will go through the steps of setting up the DDNS service on self-host linux machine with namecheap. Before we start, make sure you have all below things ready:
- a domain you own e.g. example.net (from namecheap)
- a linux server running 24/7 hosted on your home network and connected to the internet

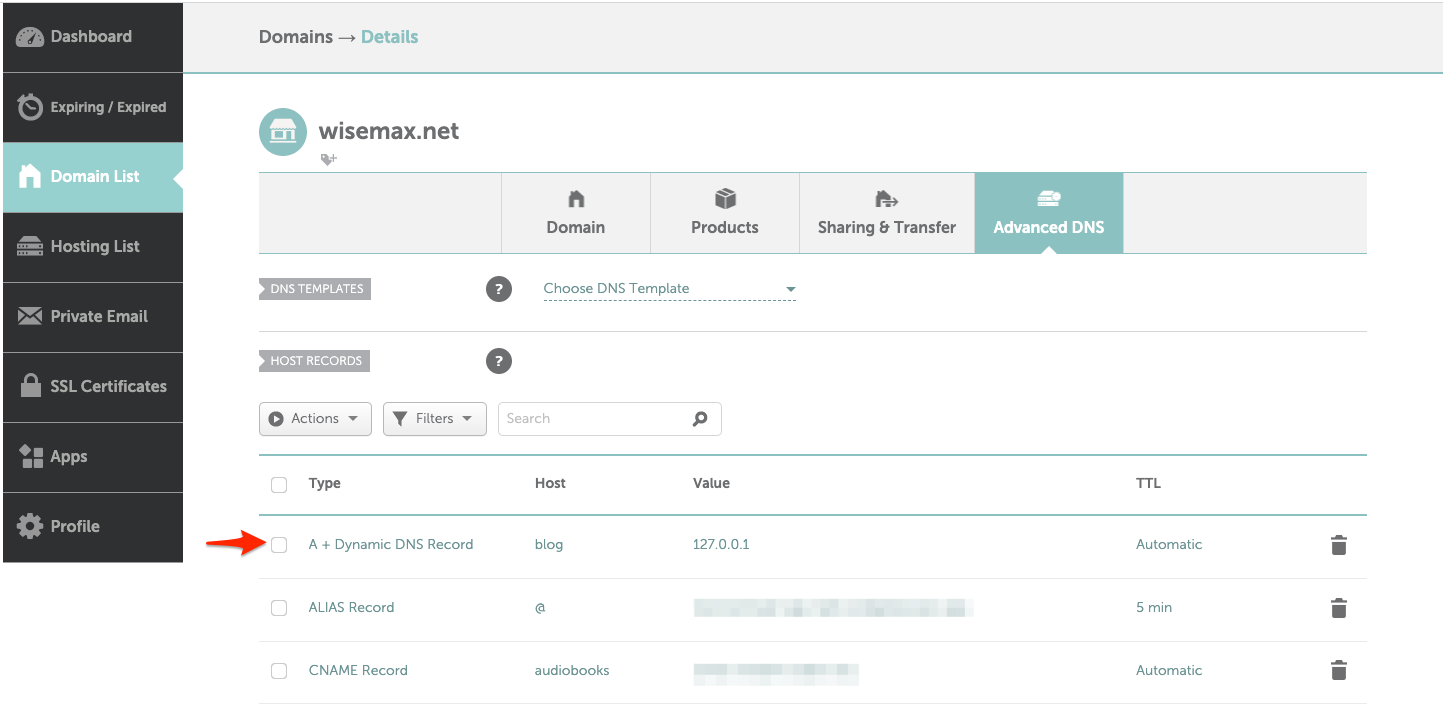
First, login to your namecheap account: go to Dashboard, find your domain name and click manage -> Advanced DNS. On this page, you will see a list of for your domain name. Add a new entry: in the type dropdown, select A + Dynamic DNS Record, host = blog, Value = 127.0.0.1, TTL = Automatic, click save change green button. Here we are adding a subdomain blog entry, but you can add root of your domain too, just use @ for host.

Copy the password string and use it in the PASSWORD parameter in the script.On your linux server machine, create a bash script below, replace the HOSTNAME, DOMAIN, PASSWORD arguments to your settings.
#!/bin/sh

HOSTNAME=YOUR_HOSTNAME
DOMAIN=YOUR_DOMAIN
PASSWORD=YOUR_PASSWORD

current_ip=$(curl ifconfig.io)
dyn_ip=$( host "$HOSTNAME.$DOMAIN" | sed -e "s/.*\ //" )

if [ "$dyn_ip" != "$current_ip" ]; then
    respond_code=$(curl --silent --output /dev/null --write-out "%{http_code}" --location "https://dynamicdns.park-your-domain.com/update?host=$HOSTNAME&domain=$DOMAIN&password=$PASSWORD" )
    if [ "$respond_code" = "200" ]; then
        echo "succesfully updated $HOSTNAME.$DOMAIN"
    fi
fi
Finally, to schedule this script to automatically run at certain interval, we can use crontab job scheduler.
5 * * * * /home/ying/check_and_update_ddns.sh
This script will be run every hour at 5th minute of the hour. You can customize it for your needs. Refer to cron documentation for usage.
